I started my career in the early days of 3D game characters and was rigging, skinning, and integrating everything I built from day one. Tech Art was not often an established role in the early days, so I often took on pipeline work: scripting and optimizing tools to enable skinning transfer, developing rigs for animators, and working on the particular challenges of developing character creation systems for RPGs.
Materials | Unreal Engine 5 and UEFN
Materials in the Unreal engine sit at the heart of every asset pipeline. They are essential in enabling artists to author any asset to a high level of quality, hitting a visual style, and finding the efficiencies you need to ship a game with a lot of art.
Building good Unreal materials is as much about art style and asset pipelines as it is about having a solid understanding of shader math and how efficient shaders work.
There are a few broad categories of materials that I’ve worked on:
- Outfit – General purpose character materials that cover the standard PBR use cases in addition to being good at cloth, and offering some optimized use of layered detail to help keep texture sizes down. Modern characters are often split into multiple meshes, making a heavy layering approach overkill for most projects. It’s common to experiment heavily with rendering stylization on character materials (half-lambert shading, rim lighting, etc).
- Skin – Unreal offers solid out-of-the box skin shading models, so the challenge here is really in regard to character customization. If you are offering players or designers the ability to change skin tones, careful consideration and work needs to be put into how to implement these choices. Real people’s skin tones are not decoupled from their faces, and their complexion is not an HSV slider. Good solutions exist, and they are a classic case of integrating art direction and tech art.
- Hard Surface & Architecture – These categories often overlap as they both make use of tiling textures and re-use details. Moduarity is essential in building detailed worlds or detailed machines. Nanite can be massively freeing for artists working on hard surface if it’s integrated into these materials in a flexible way. Trim sheets, custom decal response, distance field effects, vertex-color-driven effects and many more features can make impressive looking, reusable art. The challenge comes in making choices as all of these features together can be too heavy to use everywhere, and these materials need to be used everywhere.
- Landscape – I’m using “Landscape” as a category here to include the highly-custom materials used on terrain, as well as foliage materials and simple layered materials used for the modular landscape assets that are used in conjunction.
- Special Case & VFX – Every other material listed so far needs to be mandated for use across a project (develop a base material with limited static switching and make sure every other use is a material instance). It’s great that Unreal allows all artists to try and add custom materials of their own, but doing so across a large project can kill performance. The special cases I’ve built materials for include skies, fog, water surfaces, glass and post processing. I’ve also built general purpose VFX materials for use with Niagara.
Character Tech Art | Spacesuit Kitbash Tool
At Bethesda, I made a switch from 3ds Max to Blender, partly because I saw the formerly robust Maxscript community reflected in the booming Blender Addon scene. I developed a python tool for modular spacesuit assets – with the goal of enabling environment-style kitbashing of character art assets.
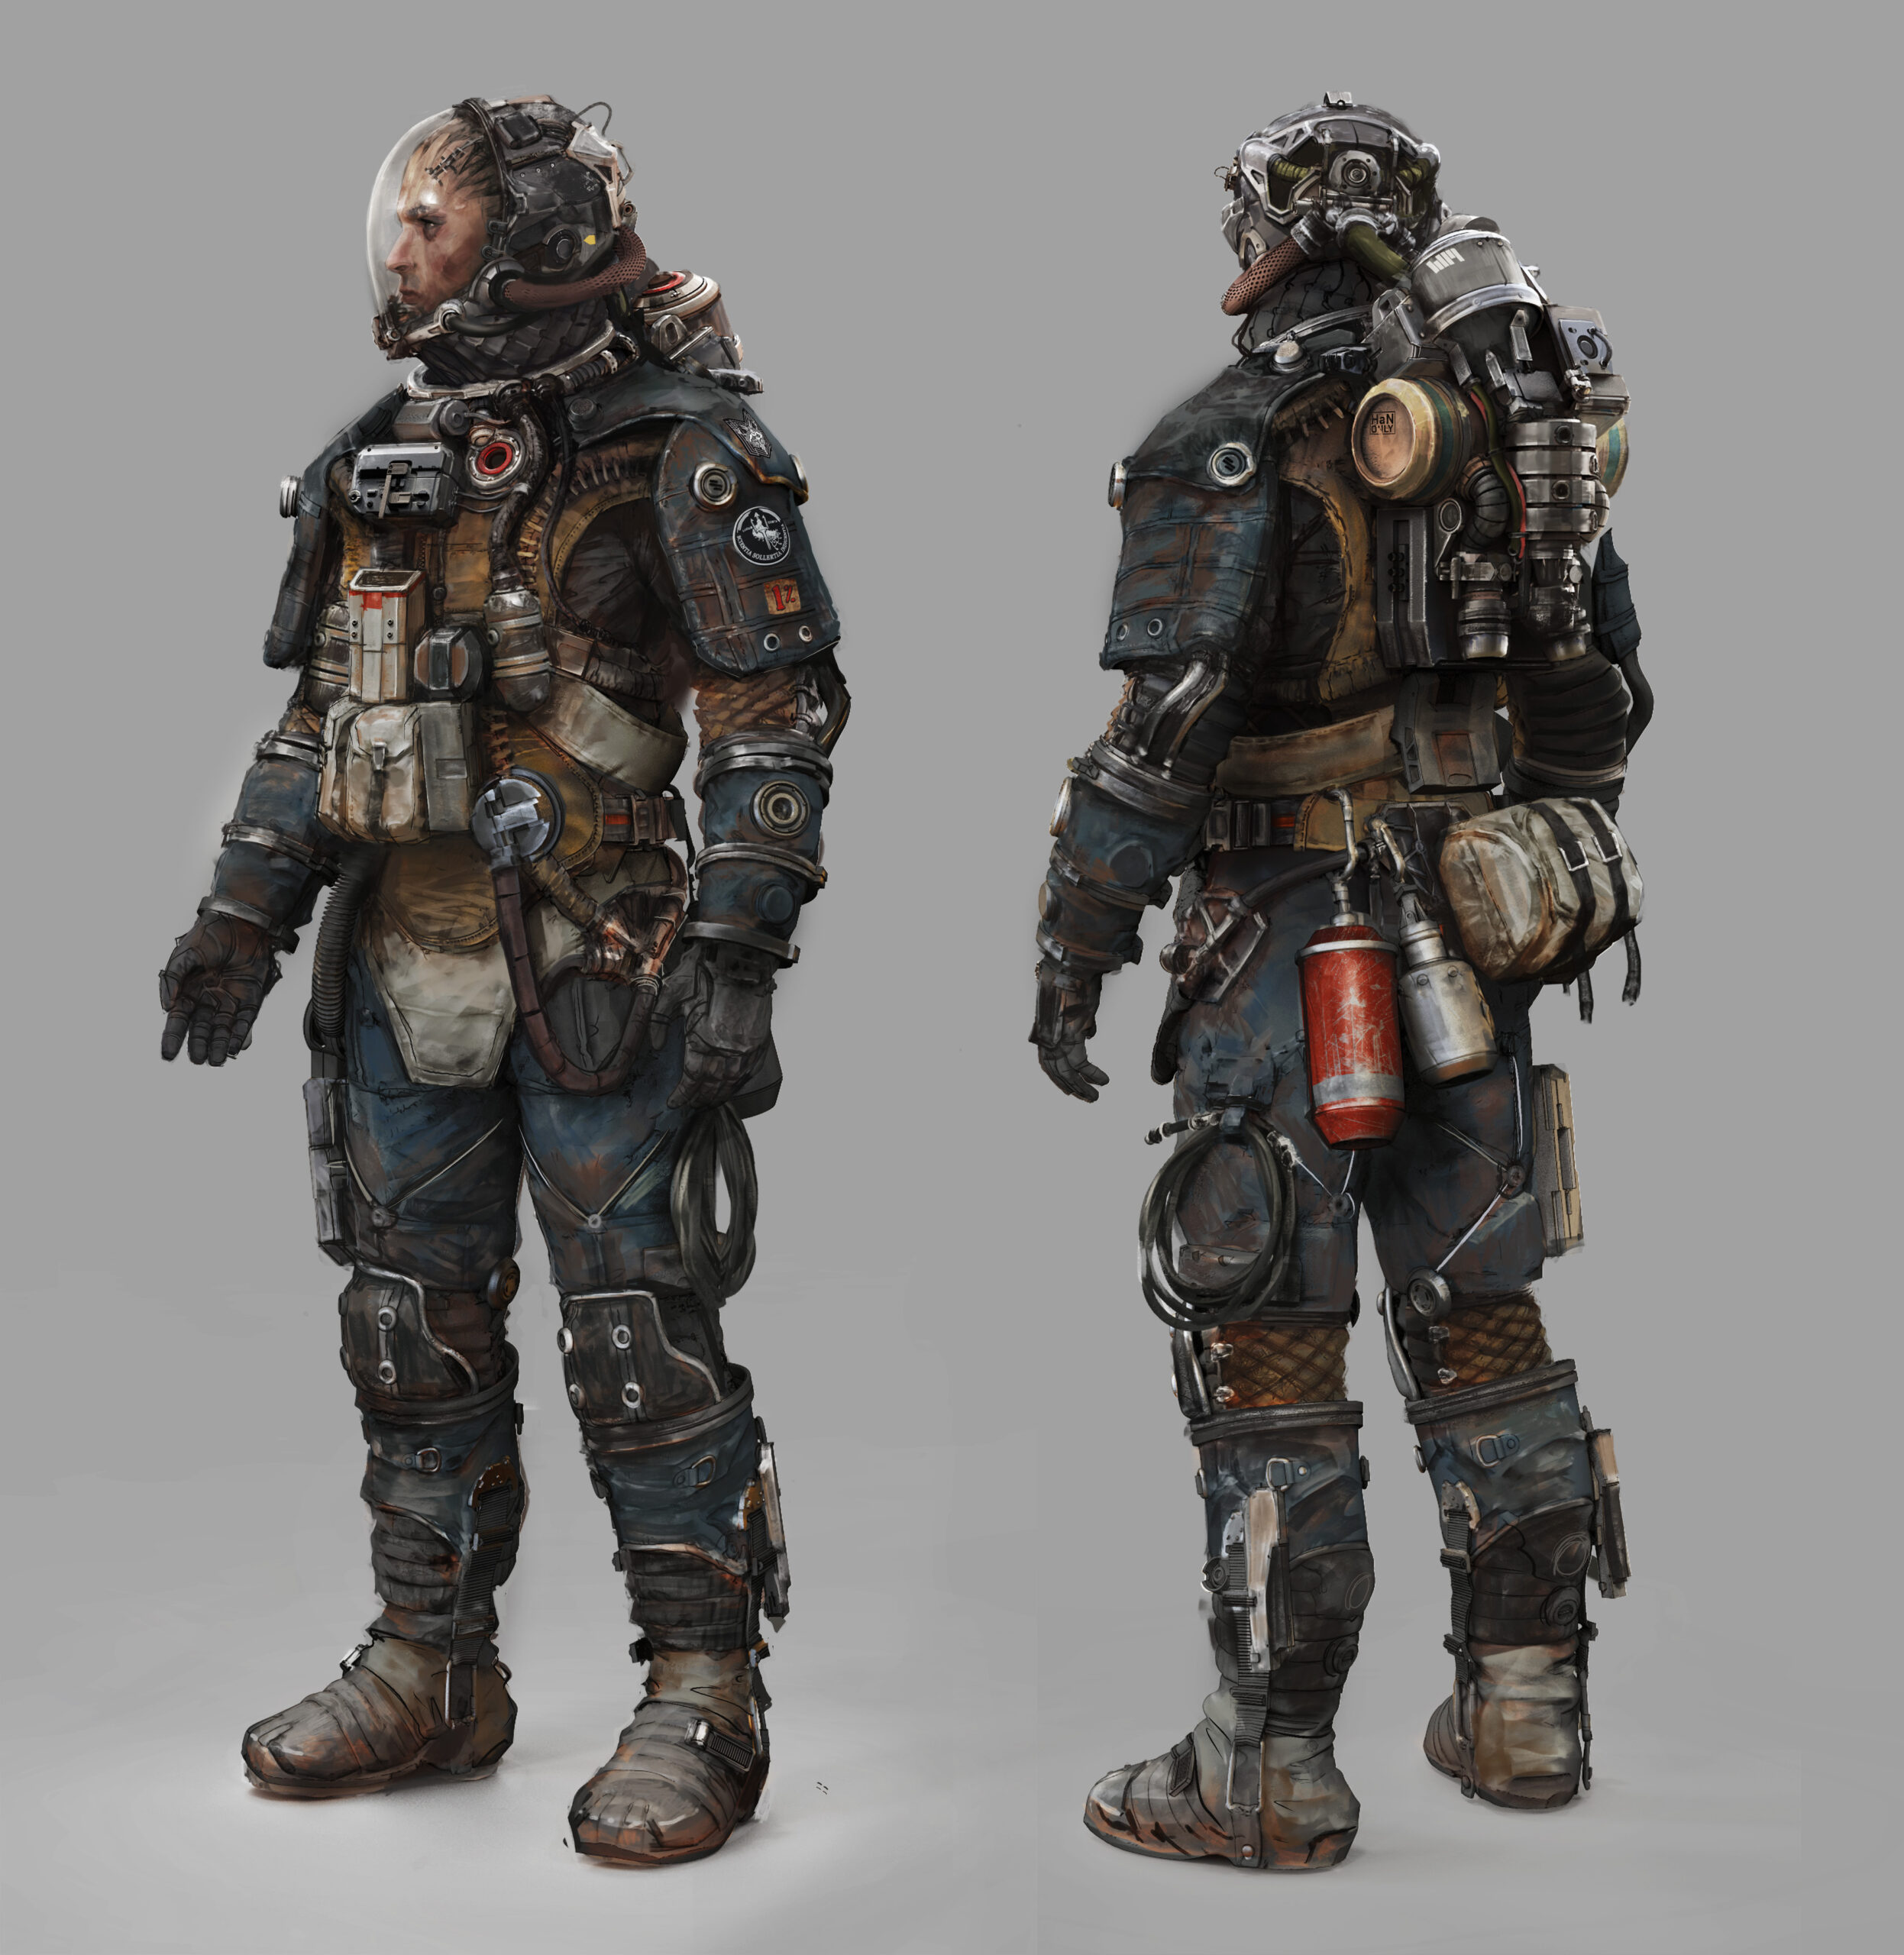
The character above shows the potential. Every piece of kit on this character is part of consolidated texture sheets. If you wanted to make a character with a slightly different spacesuit, you’d need to do a lot of manual work to recreate every piece of shared kit on the new character. Materials do not transfer over without a lot of tedious work. My tool allowed an artist to take a variety of pieces from different characters, re-pack the UV sheets, transfer all texture maps, and enable a re-built Substance Painter scene with the new character, ready for touch-up and re-export.
Workflows like this can be massive time savers when making high-detail AAA assets. Sculpting a character like this can take more than a month, then low poly, UVs, bakes, and materials can take weeks longer. Starfield’s kitbashed aesthetic afforded a huge efficiency gain when we could adopt a modular approach to character art.
Character Tech Art | Unreal Engine Characters
In my professional and independent work in Unreal Engine 5, I’ve had a chance to build Control Rigs for animation and runtime procedural motion. I can only share the one following example due to NDAs. For the prototype version of Proof, I built a custom anim blueprint for mixing various types of animation. The full game would feature full custom facial animation for dialogue-heavy gameplay. Metahuman Animator provides fantastic facial animation results using only an iPhone to record performance. The challenge is that Metahumans in general, and Metahuman Animator especially, are designed for ‘filmmaking,’ not games out-of-the-box. If you play facial animation from Metahuman Animator on a character, their head will detach.
I made a Youtube tutorial detailing the Tech Art issues I ran into creating my NPC characters, and how I solved them:
My custom anim blueprint extracts the head and face motion and blends it with whatever body motion is happening. This allows facial animations to play on characters no matter the situation. To complete the setup, I added procedural eye blinks on top of random idle animations, and automated eye tracking with eye saccades (subtle natural eye flicks).
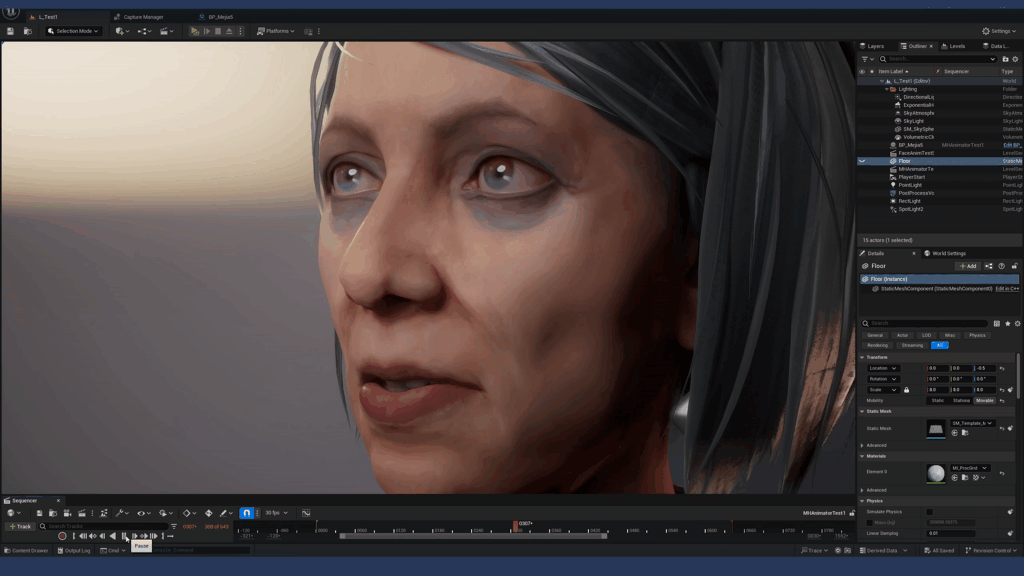
This is a common setup for larger games, but the benefit here is that it would allow a lot of custom dialogue animation to be produced by a very small team. Metahuman Animator is an extremely powerful tool that has seen little adoption among indie scale studios because of the pipeline challenges that it brings. This approach could allow a small team to produce a large volume of detailed animation, punching above its weight.
3D Scanning and Scan Processing
I was inspired by the use of 3D scanning in 2015’s Star Wars Battlefront and the GDC talk that the team gave on their process. At Bethesda Game Studios I used a studio camera and some basic gear to develop a pipeline built around Reality Capture. I used some custom light baking tricks to de-light the scans. This process involves baking the style of lighting that the subject was captured in so that the same lighting can be subtracted from the color data that was captured. The result is a 3D asset that can receive lighting in-game and still look natural.
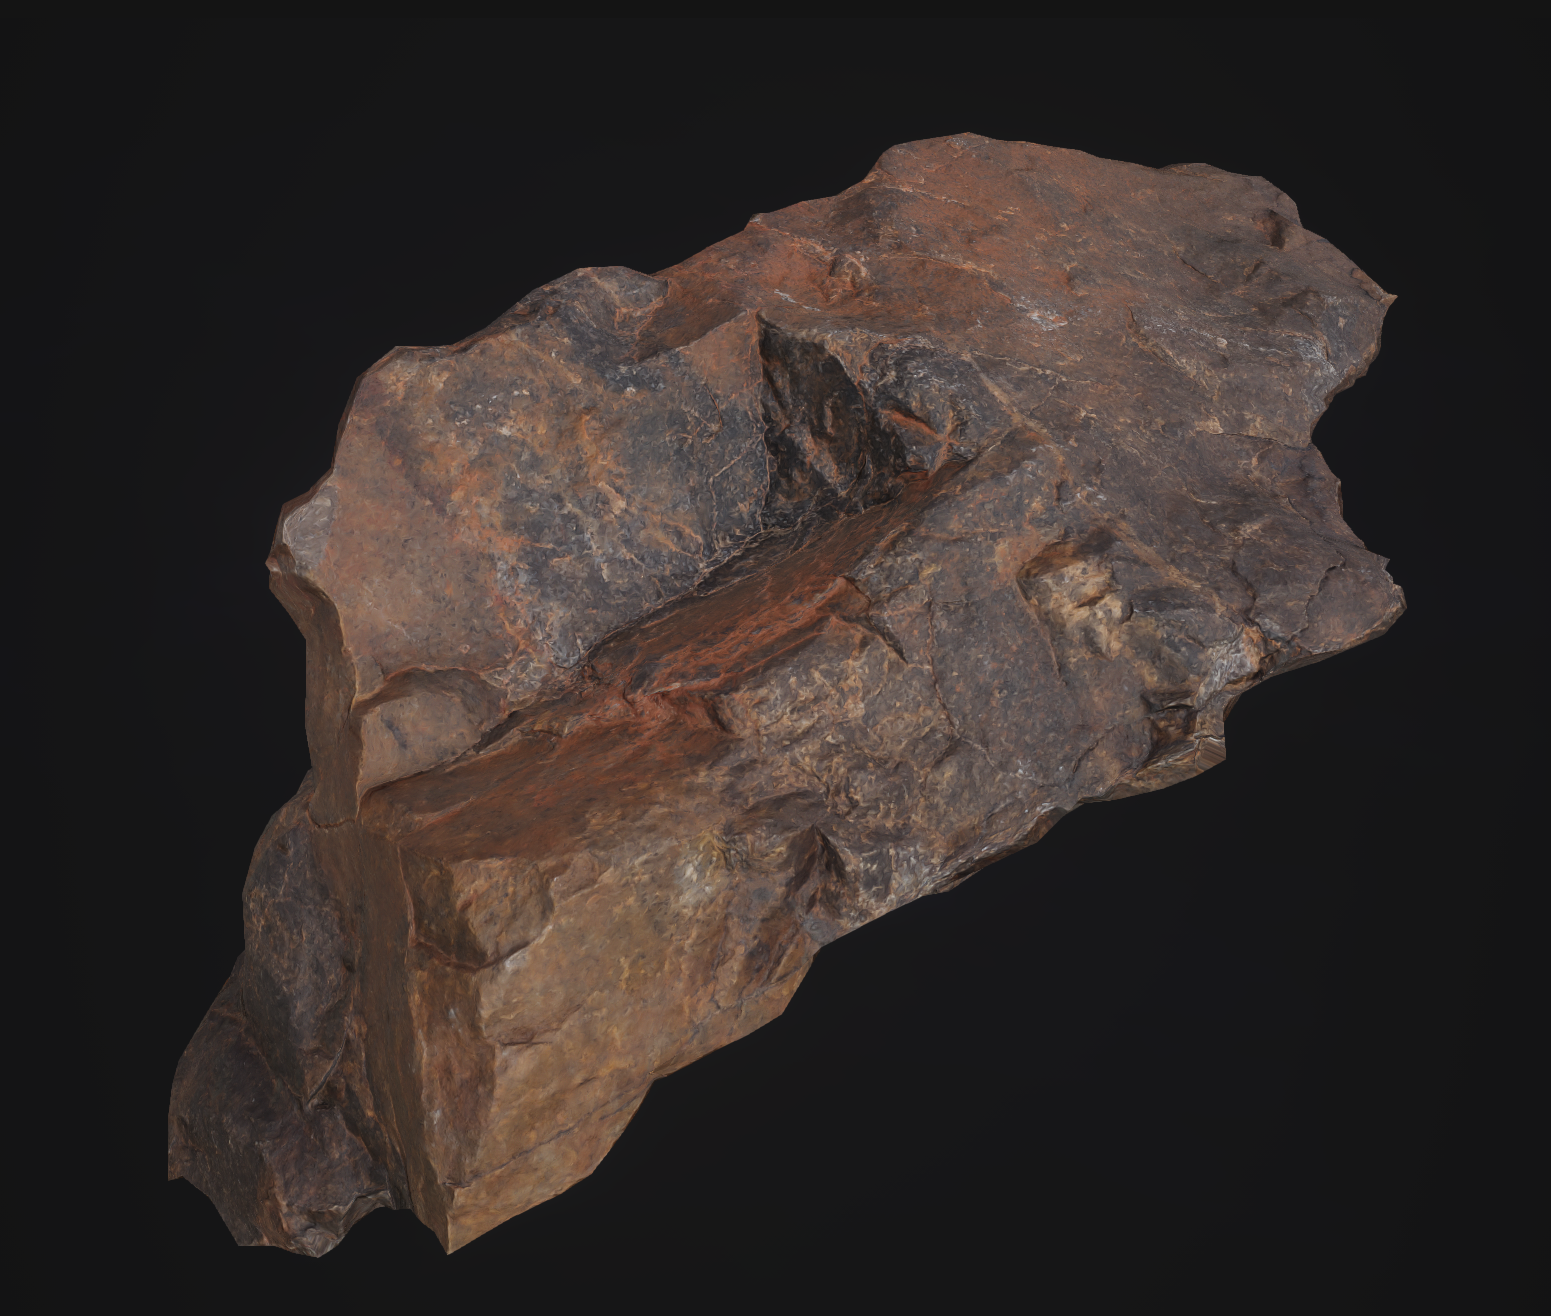
Modern 3D scanning tools have improved to the point where results captured with phones are nearly as good, but no tool has yet automated the de-lighting process.
I went a little farther with our setup, introducing cross-polarized exposures that could be used to capture specular data from the scan. I then designed a full face capture rig for us 3D scan actors in-house. This requires a rig of 20+ cameras with synchronized exposures.
Modern AI tools may provide similar quality of 3D capture in the future, but these tools still often fail to deliver usable real time assets. As a game developer looking to ship games, my goal was always to deliver tools that could speed up the creation of shippable assets.